For many business owners, WordPress multisite is the answer to more than a few prayers. For one, it’s probably the easiest way to manage several websites simultaneously.
That said, getting started can still seem pretty daunting. If you don’t have the time or confidence to manage one WordPress site, juggling several might seem unthinkable!
However, with a little knowledge and practice, WordPress multisite makes managing several similar sites a breeze.
In this guide, we show you how to make the most of multisite, provide a tutorial for getting it set up, and let you know who you can call for help if needed.
What Is WordPress Multisite?
WordPress multisite is a feature that lets you manage several websites from one WordPress.com installation or dashboard. Many people use multisite installations to share the same plugins and resources between sites, update and edit content faster, and manage several business sites and pages under one roof.
WordPress Multisite: How It Works, Plus Key Features
Running multisite WordPress is similar to managing a single WordPress website through your dashboard. The main difference, however, is you’re now a “Super Admin”.
Being a Super Admin means instead of controlling just one site, you’re overseeing several at once. You can, however, appoint separate Admins to control individual sites. You get to approve changes to certain features and have the final say over each site’s plugins and themes.
You even have the power to launch different versions of the same site or online store in different languages and regions.
What’s more, running a multisite means running a single WordPress installation through one domain, but each website has unique subdomains or subdirectories.
The Pros and Cons of a WordPress Multisite Network
Let’s examine the pros and cons of running a multisite network. If you’re unsure whether it’s right for you, skip to the next section.
WP multisite setup pros and cons in brief
| Multisite pros | Multisite cons |
|
|
The pros of WordPress multisite
- Sharing files and assets saves you money. Creating separate websites on separate servers is time-consuming and costly. If you want to run lots of different sites simultaneously, managing them all through a single multisite server package is cost-effective.
- It’s fast and easy to develop new, additional sites. If your business scales up or you acquire new brands, multisite helps you create unlimited new websites under a single domain. All sites can share the same themes and plugins, meaning there’s no need to start from scratch for every site.
- It’s one login for multiple sites. You don’t have to log into several WordPress dashboards to adjust and manage your websites. Just log into your usual WordPress dashboard and control all your own sites.
- There’s less code required. A multisite installation uses one set of code for several websites at once, meaning you save space on your server.
- You can keep branding consistent. You can use multisite to apply common marketing visuals across several websites at the same time. For example, you could create different language websites or services for different audiences with the same branding.
- Administration is simple and tidy. Centralizing your website admin in one place helps keep things straightforward and concise. It’s easier than searching for different elements of each website to manage on separate platforms.
The cons of WordPress multisite
- Separate database tables can affect performance. Although your sites all share a database, each has a different database table subset, which can affect each site’s capability and speed.
- The Super Admin is in high demand. As a single user, the Super Admin of a multisite needs to cater to all Admin requests. Admins must wait for the Super Admin to respond and authorize certain changes.
- If one site goes down or gets hacked, so do the others. Running several sites on one shared server means that if one suffers from malware, the others get attacked, too. Increased traffic can also negatively impact separate sites running on the same server.
- Multisite isn’t supported by all plugins or hosts. Some hosts only cater to single-site installations, and not all plugin developers enable their software to be used on multiple sites simultaneously. You might be restricted in terms of what you can download, apply, and use.
- It needs some technical knowledge. If you develop errors across all your sites, it can take some technical know-how to get everything back up and running again. Perhaps it’s best to call in an expert!
- Migrating can be complex. Finding a provider that supports WordPress multisite installation can be difficult. Moreover, it’s more difficult to migrate multiple sites at once than to move a single installation.
Should You Use WordPress Multisite?
Multisite WordPress might sound great on paper, but it’s not necessarily a good choice for all users.
Multisite might be a good idea if you want to run:
- Client sites: If you’re a web developer managing several different sites for various clients, hosting them on the same server might be more cost-effective and convenient.
- A company intranet: You could use the multisite feature to create separate websites and knowledge bases for each department and share information and branding.
- Business or e-commerce sites: Allowing multisite WordPress usage lets you create different versions of the same service or product website. For example, you could host territorial variations on the same product line, accounting for differences in language and culture. You could then delegate network administrator controls to business reps in each region.
- Nonprofit communities: Some organizations, such as charities and universities, run WordPress multisite setups to provide subsites for blog networks, forums, and communities.
- Affiliate marketing: Running WordPress subsites for passive affiliate marketing income is affordable and easy with a multisite setup.
However, there are a few use cases where running multisite WordPress might not be the best option.
For example, getting WordPress to enable multisite takes significant effort, and we recommend you have some experience running a basic site before getting started. Moreover, it’s not a great option if you want to vary your sites’ functionalities and appearances. If you’d prefer a custom experience, managing them separately is better.
Beyond these points, running a multisite configuration requires additional security and hosting support, which can often increase costs, at least initially.
If you decide a WordPress multisite configuration is right for your needs and you have the resources to support it, keep reading. Remember, too, that you can always hire a WordPress developer to handle the finer points of multisite.
How To Install and Set up WordPress Multisite: 9 Steps
Installing and setting up WordPress multisite for the first time can take effort and technical prowess. If you’re up to the challenge, here are the nine key steps you need to follow:
- Check the technical requirements
- Enable WordPress Multisite
- Review your WordPress multisite domain settings
- Sort Your SSL Certificates
- Set up WordPress Multisite
- Configure WordPress multisite network settings
- Sort plugins and themes
- Add new websites to the multisite network
- Add default content and Google Analytics
Before setting up a multisite WordPress network, back up your existing site via an FTP (file transfer protocol) client such as FileZilla or Cyberduck, a secure shell (SSH), or a file manager. Check out our complete guide to website backup solutions and find a method that works for you!
One last thing – the steps below are the general process for setting up multisite for WordPress. Be aware that your host might have a slightly different roadmap.
1. Check the technical requirements
Firstly, check if your web host can handle multisite. Look for a product or package that specifically offers a multisite-ready server.
Otherwise, you might quickly find that your server can’t handle the load and could even violate your provider’s terms.
We recommend using a dedicated or private WordPress hosting server, where you have exclusive access to your host. Otherwise, the sites you create are at the mercy of external users on the same server, too.
Finally, as mentioned earlier, it pays to have a program such as FileZilla, which offers FTP access to your core WordPress files, ready to go.
2. Enable WordPress multisite
To activate multisite WordPress, you must edit a file called wp-config.php, one of WordPress’s most important core files.
To access wp-config.php, you need to log into your FTP client. In this case, we’re using FileZilla. Ask the hosting provider you’re setting multisite up with for login details.
Once logged in, you should see your site’s internal files and subfolders:
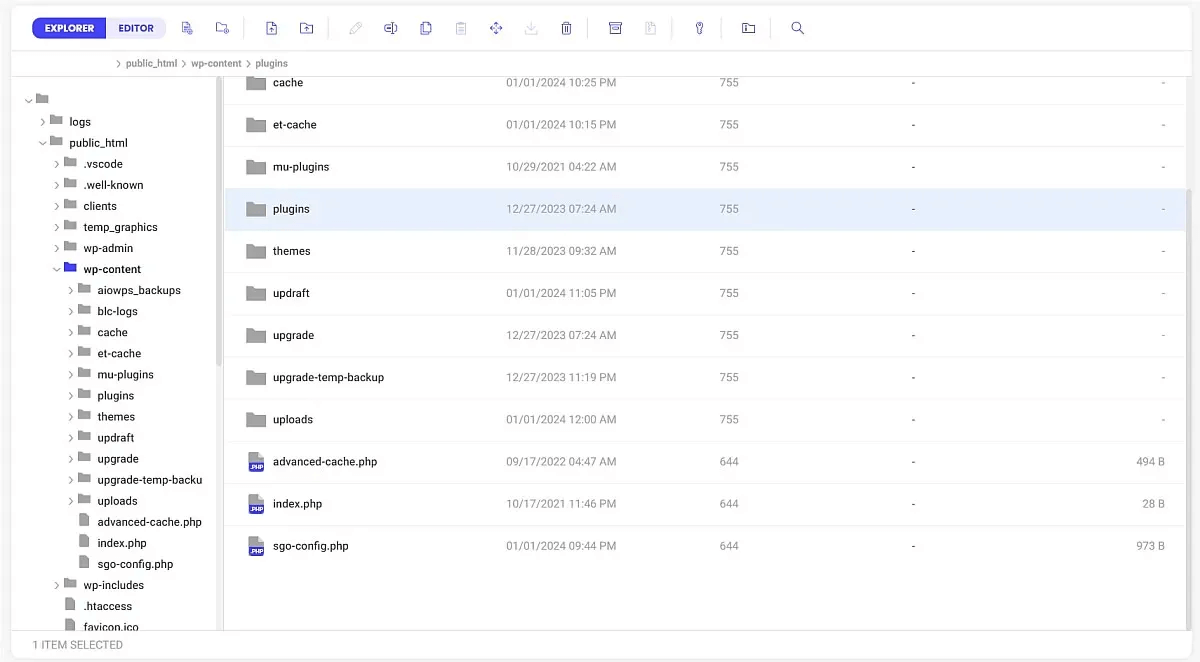
From there, follow these steps to enable WordPress multisite:
- Look for wp-config.php in your root folder (usually public_html)
- Right-click and save a copy of wp-config to your drive
- Open the original file through FTP
- Scroll down to the message reading: /* That’s all, stop editing! Happy blogging. */
- Above this line, add:
/* Multisite */
define( ‘WP_ALLOW_MULTISITE’, true ); - Save the file and head back to WordPress
- Under the “Tools” dropdown, you should now see “Network Setup”

3. Review your WordPress multisite domain settings
On the Network Setup page, you must choose between running your new websites on either subdomains or subdirectories.
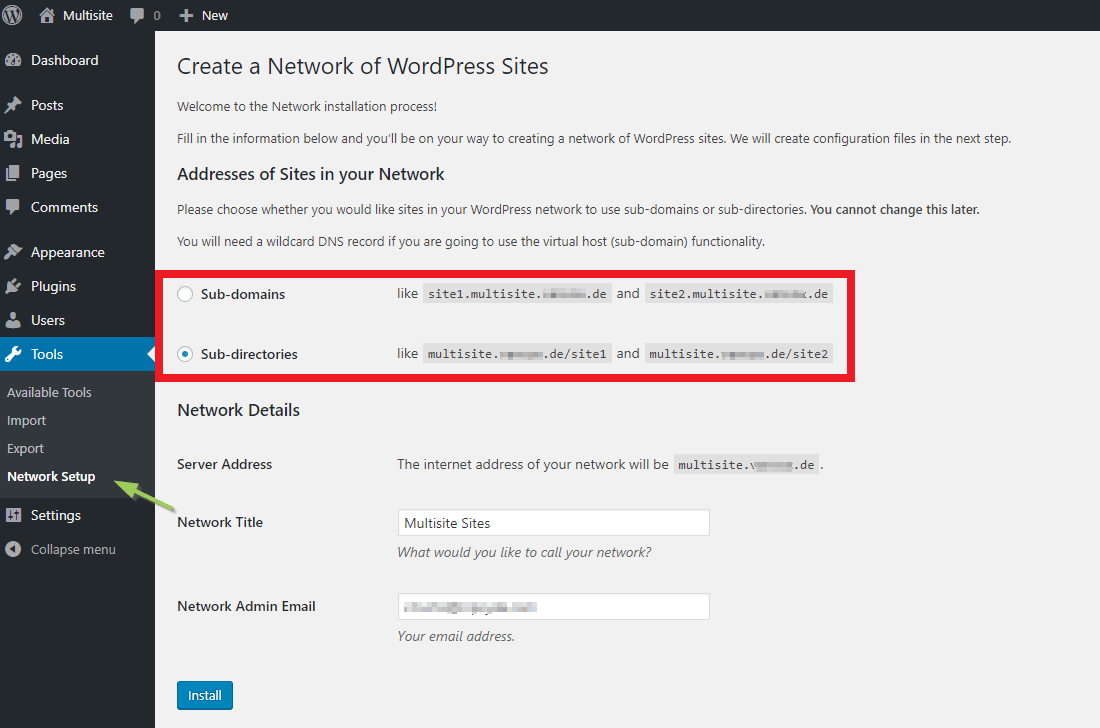
Subdomains let you create separate addresses for each website while still connected to the host domain. For example, a subdomain might be “https://newsite.example.com,” where “example” is your current domain.
Alternatively, you can set up subdirectories on the existing domain. These would appear as “https://example.com/newsite”.
Typically, you use subdomains to establish different types of content, for example, a different brand for each domain. You might use subdirectories to establish differing content that’s still part of a common umbrella – so, different product pages for the same brand, or national pages for different audiences.
If you don’t use domain mapping, you need to create a brand-new domain for each subsite in the network. Mapping your domains helps to make this process cleaner and easier, and if you’re running WordPress 4.5 or later, it’s built-in for you.
Always double-check these multisite settings before proceeding. If you decide to change them in the future, reconfiguration can become somewhat complex.
4. Sort Your SSL certificates
SSL (secure socket layer) certificates ensure that any data shared at the domain level is encrypted. Without them, you and your website visitors risk losing sensitive data.
Web hosts often offer SSL certification for your primary domain name. However, there’s a chance you might need to buy a separate certificate for each of the domains you create. You’ll need to contact your host to be sure.
You must install SSL certificates for each site you’re running, or they’re all at risk. Hosts such as WP Engine offer useful guides on how to find and set up SSL for your domain(s).
Some hosts, meanwhile, offer special multisite SSL packages where you can register certificates for hundreds of sites in one go.
Web hosts sometimes install SSL certificates for you or offer a DIY option – though the process may vary depending on who you register with.
Therefore, refer to your host’s installation process and ensure it registers a valid SSL certificate for each subdomain you wish to run.
5. Set up WordPress Multisite
Now, let’s actually install WordPress multisite! Go back to the “Network Setup” page from step three, and click the “Install” button.
On the next screen, you need to “enable” your entire network. WordPress should advise you to do this in one of two ways: by editing the wp-config.php file or the .htaccess file.

Copy and paste the code(s) listed into wp-config and .htaccess, respectively, via FTP and your root folder, as shown earlier. It’s also good practice to save copies of both files as backups to be safe.
Close your browser and log back into WordPress as normal, and your settings should be saved. You might need to erase any cookies or cache files you have stored.
6. Configure WordPress multisite network settings
Configuring your WordPress multisite settings ensures your whole network works the way you want it to.
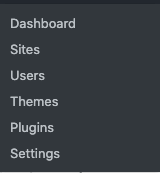
Head to “My Sites” in the main dashboard, then “Network Admin”, then “Dashboard”.
Here, you should see four main multisite network settings to configure before pushing any new sites live. Here’s a breakdown:
Registration Settings: Choose whether or not prospective Admins can create WordPress websites on your network. Consider switching to “Limited Email Registration” if you want to restrict registrations to a specific domain (i.e., people you know and can authorize). Be sure to check the box for registration notifications, too.
New Site Settings: Here, you can create a welcome email and build out default posts and pages for any new sites you create. This means your new sites go live with content and welcome visitors every time they’re created, saving you time and effort.
Upload Settings: Decide how much your users are allowed to upload per site and what file types – such as image types and documents – they can upload.
Menu Settings: Finally, there’s a sole checkbox that lets you decide if your site’s Admins have permission to deactivate WordPress plugins. As the Super Admin, you still have complete control over the adding of plugins.
7. Sort plugins and themes
It’s time to decide what software you’d like each of your sites to run on. Multisite lets you apply default installation options network-wide, so the settings just roll forward every time you add a new site.
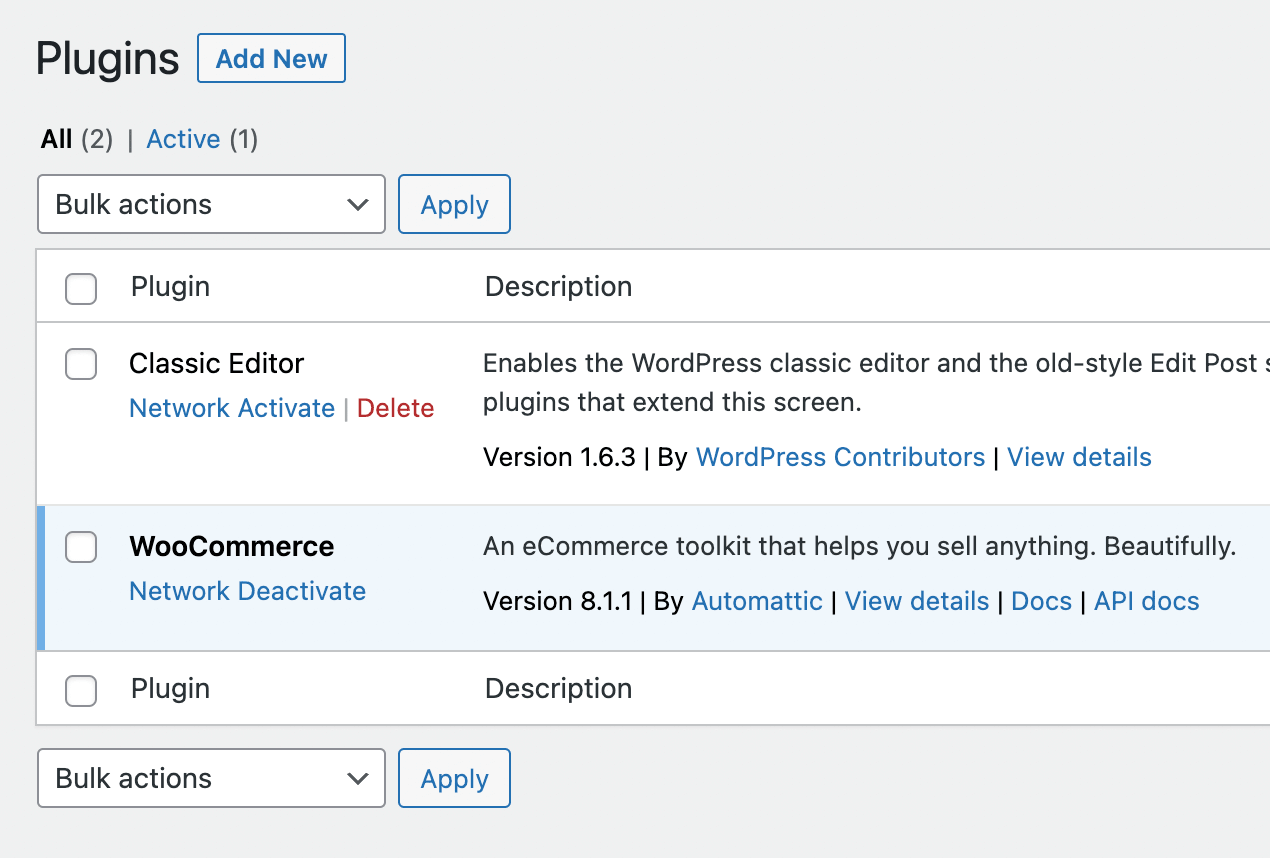
Start by opening the “Network Admin” menu from step six and selecting “Plugins”.
Thanks to multisite activation, you should see a new feature under each plugin you’ve already added – a button reading “Network Activate”. To apply a specific plugin sitewide, click this.
You can also choose several installed themes to become available to Admins and user accounts.
Head to “Network Admin”, select “My Sites”, then go to “Themes”. Like with plugins, you can decide whether or not to “Network Enable” or “Network Disable” to make specific themes available for lower-level installations.

Want to change the default theme your Admins and User roles have access to? Head back to FileZilla, open up wp-config, and add this code above the “Happy Editing” line.
| // Setting default theme for new sites define( ‘WP_DEFAULT_THEME’, ‘pick-theme’ ); |
Change “pick-theme” to the name of the folder in which your chosen theme resides – you can find this in FTP via wp-content and “Themes”:
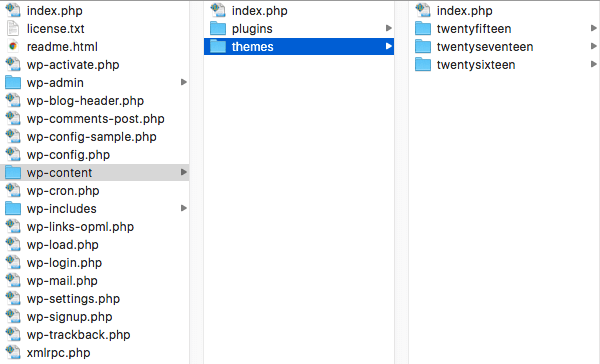
Save the file, refresh your browser, and the changes should take effect.
8. Add new websites to the multisite network
Adding new sites to your WordPress multisite setup simply keeps it growing! Thankfully, doing so is fairly simple through the dashboard.
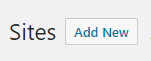
Start by heading to “My Sites”, then “Network Admin”, then “Sites”. Click “Add New”.
On the next page, you need to add the title of your new site, its unique URL, and the admin email address for whoever will oversee the site.

9. Add default content and Google Analytics
Adding default content means your new sites always have some text available upon launching – and if you remember all the way back to step six, you can fill these details out under “New Site Settings”.
In that section, enter the content you’d like each of your new sites to show once they go live for the first time and save.
Now, let’s discuss Google Analytics. GA helps you track the individual performance of your new websites and understand how users interact with your content.
To start, you need to create a Google Analytics account and build a property. If you’re completely new to GA, check out Google’s introductory guide.
The easiest route many multisite users take for GA is to just run a plugin. We suggest using MonsterInsights, a free Google Analytics dashboard you can toggle to track tags for your websites.
Add and activate the plugin using the link above, and follow the instructions supplied by the developer.
Save Yourself from Multisite Headaches: Rely on a Reputable WordPress Maintenance Provider Instead
As you can see, setting up WordPress multisite configuration takes a lot of time and effort. It’s not as easy as just logging into your standard WP dashboard and expecting to add a new site.
Why not ask an expert to help you enable and set up multisite instead? StateWP’s expert developers take as much or as little of the reins as you need, even if you want a professional to handle your complete WordPress multisite management.
Our user dashboard, Proto, is not just a useful tool for managing your sites’ health and performance. You can also raise service requests through your account and get a response (and a fix) within 24 hours.
Beyond setting up WP multisite, you can also ask developers through Proto to help you manage and maintain your websites.
Contact StateWP for more information about becoming a partner and eliminating the stress and time drain of WordPress multisite.
Get Started with WordPress Multisite Today
WordPress multisite has tons of great benefits. It’s ideal for businesses, nonprofits, and community groups who want to manage several similar WordPress sites from a single dashboard.
However, while it’s a huge time-saver and even a big cost-saver in the long run, it still takes a lot of effort to get up and running, and then maintain.
It’s why delegating your multisite setup and management to WordPress devs makes so much sense. By partnering with StateWP, you always have a team of multisite experts ready to keep you secure and fix any problems that come your way.
If you’re new to WordPress in general, it might be a good idea to get to grips with a single installation first. Check out our beginner’s guide to website maintenance as a fitting introduction to WP.
Or, if you’re running a web design agency and want to offer multisite support as an extra perk for your customers, check out our complete guide to white-labeling WordPress maintenance.
WordPress Multisite FAQs
Let’s close with some commonly asked questions about setting up and using WP multisite.
Should I enable WordPress multisite?
You should enable WordPress multisite if you want to run several sites at once and don’t mind using the same plugins, themes, and general settings for all. It’s also a good option if you have a private or dedicated server that can handle multisite demands.
Is WordPress multisite good for SEO?
WordPress multisite is not necessarily good for SEO, as Google’s crawlers can struggle to interpret between duplicate or similar content. That, unfortunately, could lead to Google ranking you lower than anticipated for specific keywords.
However, if managed efficiently, WordPress multisite can benefit SEO in terms of the time you’d save publishing content and in that you can apply the same best practices to multiple sites at once. Read more about multisite benefits above.
How many sites can WordPress multisite handle?
There’s no upper limit to the number of websites that WordPress multisite can manage. However, the more sites you create through multisite, the more pressure you put on your server.
That means an excessive number of websites under one installation might result in performance issues and regular crashing.
How do I convert my WordPress site to multisite?
- Using an FTP client, edit your wp-config file (full details are in our guide above)
- Head to your WordPress dashboard and look for “Tools”
- Select “Network Setup”
- Make sure the details on the next page are correct
- Click “Install” and follow the final instructions on the screen
How do you tell if a site is a WordPress multisite?
You know a WordPress multisite if, when you sign up as a new user, you’re redirected to a brand new domain. It’s also easy to spot multisites if domain addresses change while navigating a main site’s content. There’s no way to guarantee you’re browsing a multisite, however – but your experience shouldn’t differ compared to browsing a single site if a reputable host is involved.